Windows Golden Image Building: Offline Updates ISO
Introduction
In enterprise deployments, the Golden Image is the cornerstone of efficiency and security. It is a standardized system template pre-integrated with the latest patches, drivers, and configurations. This avoids repetitive online updates for each device and shortens deployment cycles. Offline Servicing is the core method for creating golden images: by injecting updates directly into install.wim using the DISM tool, devices start from a secure baseline at initial boot.
This guide uses command-line operations as the core, providing an end-to-end workflow to help users build a streamlined, secure, and rapidly deployable Windows 10 LTSC 2021 installation medium from a raw image.
I. Core Concept
Before diving into practice, a thorough understanding of several core concepts is essential. Many common failures in image servicing stem from misunderstandings of basic components and their interrelationships.
1.1 Windows Image Formats: WIM vs ESD
Windows installation files primarily use two formats, with servicability as the key distinction:
- WIM (Windows Imaging Format) :
A file-based image format that supports mounting and modification (e.g., adding updates, drivers), multiple image indices (one file contains multiple Windows versions), and single-instance storage (duplicate files are stored only once to save space). It is the only operable format for offline servicing. - ESD (Electronic Software Distribution) :
A read-only format with high compression (20%-30% smaller than WIM), used for network distribution (e.g., Media Creation Tool). Cannot be directly mounted or modified—— it must be converted to WIM first.
Conversion Method (taking install.esd as an example):
Query image indices in ESD:
Export to WIM (using index 1 as an example):
1.2 Windows Update Ecosystem: SSU, LCU, and.NET
The core of offline servicing is correctly integrating updates. Understand the following types and their dependencies:
- Servicing Stack Update (SSU) :
Updates the "servicing stack" (components responsible for installing other updates, such as the CBS engine)—equivalent to "patching the patch installer". Must be installed before LCU, otherwise the LCU cannot be parsed correctly. - Latest Cumulative Update (LCU) :
The core update released on the monthly "Patch Tuesday", containing all security/feature fixes since the version was released. Depends on the latest SSU.
→ Deep Dive: Comprehensive Analysis of Windows Update Rhythms (Monthly Patches/Preview Updates/Out-of-Band Updates) - .NET Framework Updates:
Independent cumulative updates that fix security vulnerabilities in the.NET Framework. Must be integrated separately (many applications depend on.NET, so this cannot be omitted).
Critical Order: SSU → LCU →.NET (reversing the order will cause a 0x800f0823 error, indicating "a new servicing stack is required").
II. Preparation—Setting Up the Operating Environment
A standardized environment is the foundation of success. Resolve issues related to permissions, paths, and tools:
2.1 Install Windows ADK
ADK (Assessment and Deployment Kit) includes tools required for offline servicing (DISM, oscdimg):
- Download: Obtain the ADK version matching your local system (21H2 or higher recommended) from the Microsoft official website.
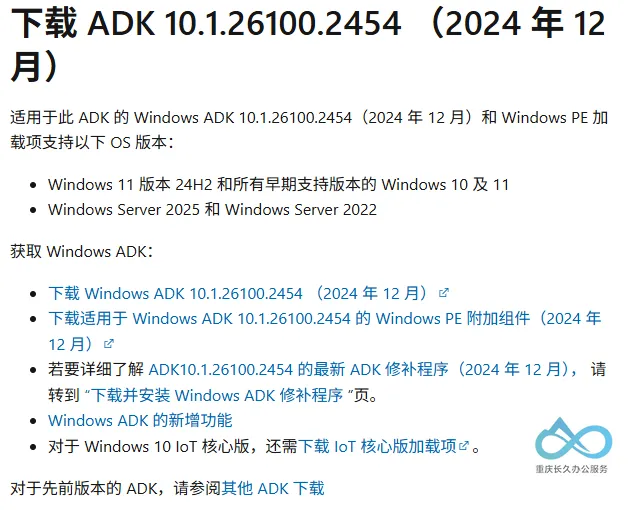
ADK Download - Install: Select only "Deployment Tools" (includes DISM and oscdimg).
- Launch: Run "Deployment and Imaging Tools Environment" as administrator (preconfigured environment variables to avoid path errors).
2.2 Plan the Working Directory
To avoid path issues, create a space-free working folder in the root directory (e.g., C:\WIM_Project) and categorize by function:
C:\WIM_Project
├─ 1_ISO_Source       # All files extracted from the original ISO
├─ 2_Updates          # Downloaded update packages (SSU/LCU/.NET)
│  ├─ SSU             # SSU updates
│  └─ LCU_NET         # LCU and.NET updates
├─ 3_Mount            # Temporary directory for mounting images (must be empty)
└─ 4_ISO_Output       # Final generated ISO files
2.3 Obtain and Prepare Source Files
- Download Official ISO: Get the Windows 10 Enterprise LTSC 2021 x64 ISO from VLSC (Volume Licensing Service Center) or Visual Studio Subscriptions.
→ Provided by our site: Windows 10 LTSC 2021 MSDN Official Original Image (Initial Version 19044.1288) - Extract Files: Use 7-Zip or File Explorer to extract the ISO content to
1_ISO_Source. - Convert ESD to WIM: If
install.esd exists in1_ISO_Source\sources, convert it toinstall.wim using the 1.1 section method and replace the original file.
III. Patch Search—Accurately Obtaining Updates
The Microsoft Update Catalog is the official source for offline updates. Master the following search技巧:
3.1 Search Tips
- By KB Number: Most precise (e.g., search for
KB5062554 to get the LCU). - By Product Version: Combine keywords (e.g.,
Windows 10 21H2 x64 Servicing Stack). - Filter Results: Focus on "Title" (update type/version), "Products" (must include
Windows 10 LTSB), and "Architecture" (x64).
3.2 Example: Download SSU/LCU/.NET
Taking Windows 10 LTSC 2021 x64 as an example:
- SSU: Search for
Servicing Stack Update for Windows 10 Version 21H2 x64 and download the.msu file to2_Updates\SSU.
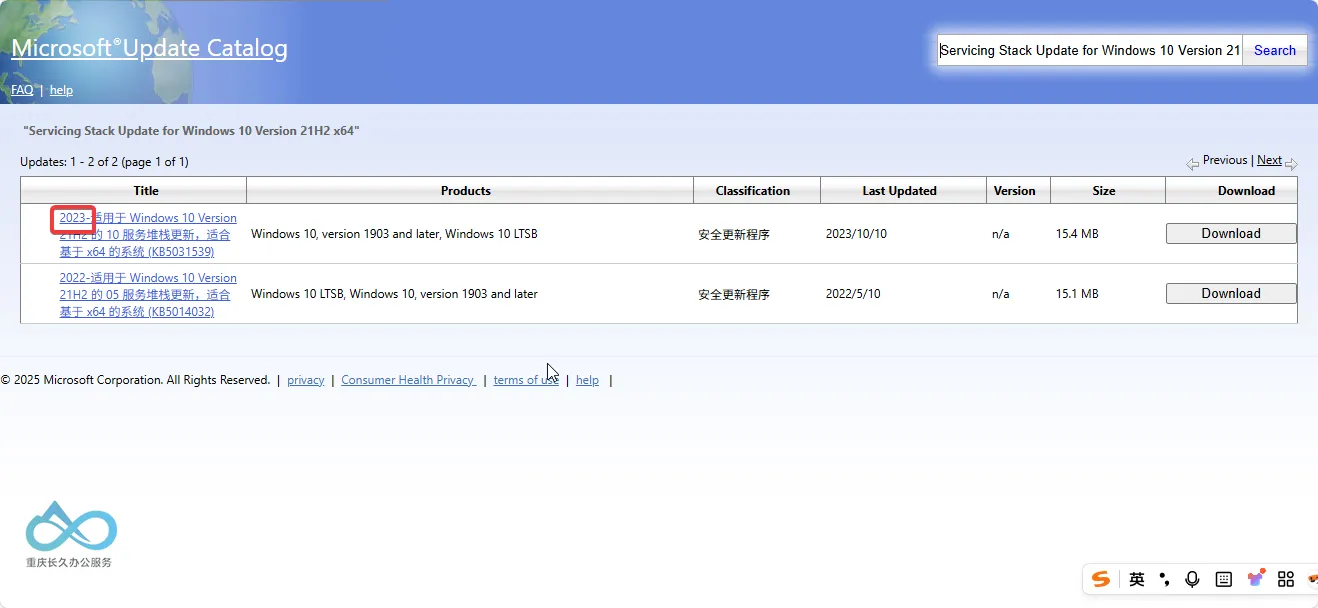
Select the Latest Version - LCU: Search for
KB5062554, select "2025-07 Cumulative Update for Windows 10 Version 21H2 x64", and download to2_Updates\LCU_NET. - .NET: Search for
KB5056577, select "2025-07 Cumulative Update for.NET Framework 3.5/4.8 for Windows 10 21H2 x64", and download to2_Updates\LCU_NET.
Naming Suggestion: Rename by installation order (e.g., 01-SSU-19041.3562-x64.msu, 02-LCU-KB5062554-x64.msu) to avoid order errors.
IV. Core Process—Integrating Updates Using DISM
DISM (Deployment Imaging and Servicing Management) is the core of Microsoft's official image management toolchain. This section demonstrates its key scenario applications:
4.1 Mount the Image
Mount install.wim to the 3_Mount directory (must be empty):
- Parameter Explanation:
/Index:1 specifies the image index (LTSC 2021 usually has only 1 index);/MountDir specifies the mount point.
4.2 Step 1: Integrate SSU (Critical!)
SSU is the foundation for subsequent updates and must be installed first:
- Verification: After installation, use
Dism /Get-Packages /Image:"C:\WIM_Project\3_Mount" to check if the SSU was successfully integrated.
4.3 Step 2: Integrate LCU
After installing the SSU, integrate the LCU:
4.4 Step 3: Integrate.NET Updates and Enable Features
Integrate.NET Updates:
Offline Enable.NET 3.5 (common enterprise requirement, depends on the original ISO's
sxs folder):- Parameter Explanation:
/All enables all parent features;/LimitAccess prevents connecting to Windows Update;/Source specifies the path to the.NET 3.5 source files (from the original ISO).
- Parameter Explanation:
V. Image Cleanup—Streamlining and Optimization
After integrating updates, clean up redundant components to reduce image size. Note: Some operations are irreversible!
5.1 Routine Cleanup:
Remove outdated components replaced in WinSxS (safe and reversible):
- Effect: Reclaims space occupied by old updates without affecting update uninstallation.
5.2 Deep Cleanup: (Irreversible!)
Solidify current updates as the system baseline—irreversible (cannot uninstall updates), but maximizes size reduction:
Warnings:
- Must be executed after all updates/features are integrated;
- Cannot uninstall any previously integrated updates after execution;
- May affect subsequent feature additions (e.g.,.NET 3.5)—ensure all features are enabled before execution.
5.3 Commit Changes and Unmount the Image
After cleanup, save the modifications back to install.wim and release the mount point:
- Parameter Explanation:
/Commit saves changes; use/Discard to abandon changes.
VI. Create a Bootable ISO—Compatible with BIOS and UEFI
Use the oscdimg tool from ADK to package the updated install.wim and original files into a dual-boot ISO:
6.1 Command Parsing
Parameter Explanation:
-m: Ignore image size limits;
-o: Optimize storage (store duplicate files only once);
-u2: Use UDF 2.0 file system (supports long filenames and large files);
-udfver102: Specify UDF version;
-bootdata: Define dual-boot information (2# indicates 2 boot entries):-
p0,e,b"etfsboot.com": BIOS boot (p0 represents x86 BIOS,etfsboot.com is the BIOS boot sector); -
pEF,e,b"efisys.bin": UEFI boot (pEF represents UEFI,efisys.bin is the UEFI boot file);
-
Last two paths: Source directory (
1_ISO_Source) and target ISO path.
6.2 Verify the ISO
After creation, verify the ISO's bootability:
- Virtual Machine Test: Load the ISO using VMware/Hyper-V and check if it can start and install normally.
→ Free Download: VMware Workstation Pro 17.6.3 Official Offline Installer + Tools Image - Hardware Test: Burn the ISO to a USB drive (use Rufus and select "MBR+GPT" format) and test BIOS/UEFI boot on a physical machine.