PuTTY from Beginner to Pro: Comprehensive Optimization & Hardware Key Passwordless Login Tutorial
PuTTY is a free and open-source SSH and Telnet client developed by Simon Tatham, renowned for its lightweight and concise design—no installation required, just unzip and run, taking up only a few MB of storage. As a veteran remote connection tool, it remains a top choice for developers and operations staff to manage servers remotely, thanks to its open and transparent code (under the MIT license) and focused feature set.
Official Project Address: https://www.chiark.greenend.org.uk/~sgtatham/putty/ (Note: putty.org is an unofficial address; we recommend obtaining the latest version from the official link.)
Why "Tune" PuTTY?
Despite its solid functionality, PuTTY’s default configuration is not "user-friendly": connections easily drop due to timeouts, it doesn’t support saving passwords (by design for security), and session configurations are scattered… These issues can deter beginners. But don’t worry—simple tweaks can drastically improve the experience; for higher security, you can also use hardware keys (like YubiKey, Feitian, etc.) to achieve passwordless login. This article will walk you through optimizing configurations + hardware key login step-by-step, making PuTTY truly "user-friendly."
This article first guides you through optimizing PuTTY’s basic configurations, then details how to achieve secure and convenient SSH login via a hardware key (assuming you’ve already imported your private key into the hardware key).
PuTTY Tuning: More Stable Connections, More Efficient Login
Step 1: Configure Basic Session Information
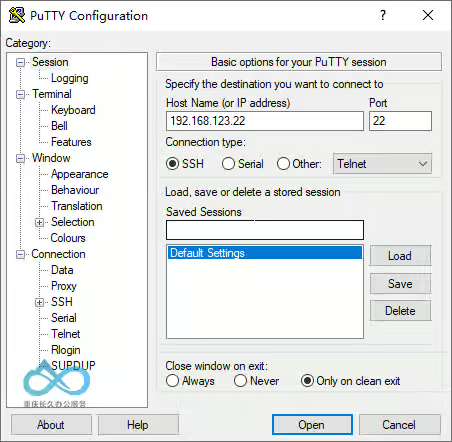
Open the PuTTY main program and select Session from the left navigation bar:
- Host Name (or IP address): Enter the hostname or IP address of the remote server (e.g.,
192.168.1.1); - Port: The default SSH port is
22(if the server uses a custom port, enter the corresponding value); - Connection type: Select
SSH(default).
Step 2: Enable Keep-Alive Mechanism to Avoid Disconnections
PuTTY has no default keep-alive configuration, so connections drop after long periods of inactivity. Here’s how to fix it:
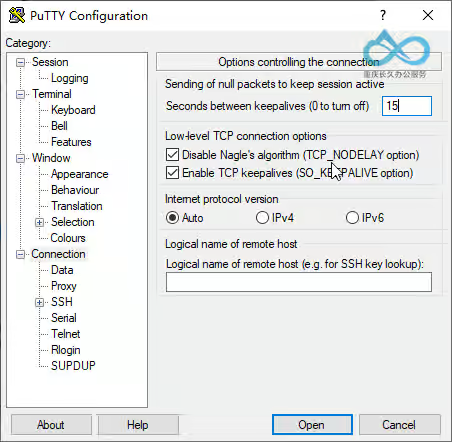
Expand Connection in the left navigation bar and keep the default subitem Connection selected:
- Find the Sending of null packets to keep session active option;
- Check Enable TCP keepalives (SO_KEEPALIVE option);
- Enter
15in Seconds between keepalives (0 to turn off) (sends a null packet every 15 seconds to keep the session alive).
Step 3: Set Auto-Login Username
PuTTY doesn’t support saving passwords, but you can preset the login username to reduce repetitive input:
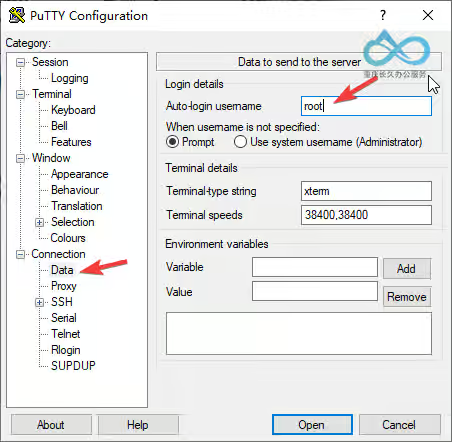
Expand Connection → Data in the left navigation bar:
- Auto-login username: Enter the login username for the remote server (e.g.,
rootor a regular user account).
Step 4: Save Session Configuration for One-Click Login Next Time
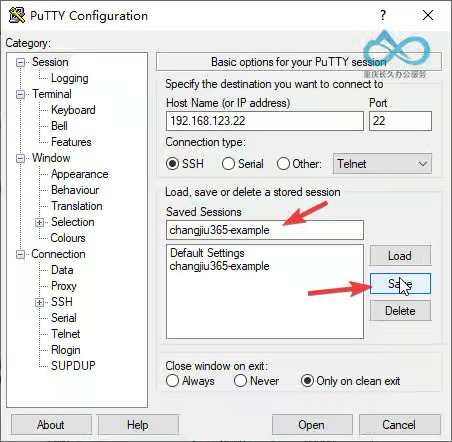
After completing the above configurations, return to the Session page:
- Saved Sessions: Enter a session name (e.g.,
ServerA-SSH); - Click Save to save the configuration. Next time, simply select the session name, click Load → Open to connect quickly.
Hardware Key Login: A More Secure Passwordless Solution
Hardware keys (like YubiKey) store private keys in physical devices, avoiding the risk of private key leakage. The following steps assume you’ve already imported your SSH private key into the hardware key.
Step 1: Import Certificate (Public Key) via Kleopatra
Kleopatra is a graphical key management tool for GnuPG, used to associate hardware keys with PuTTY:
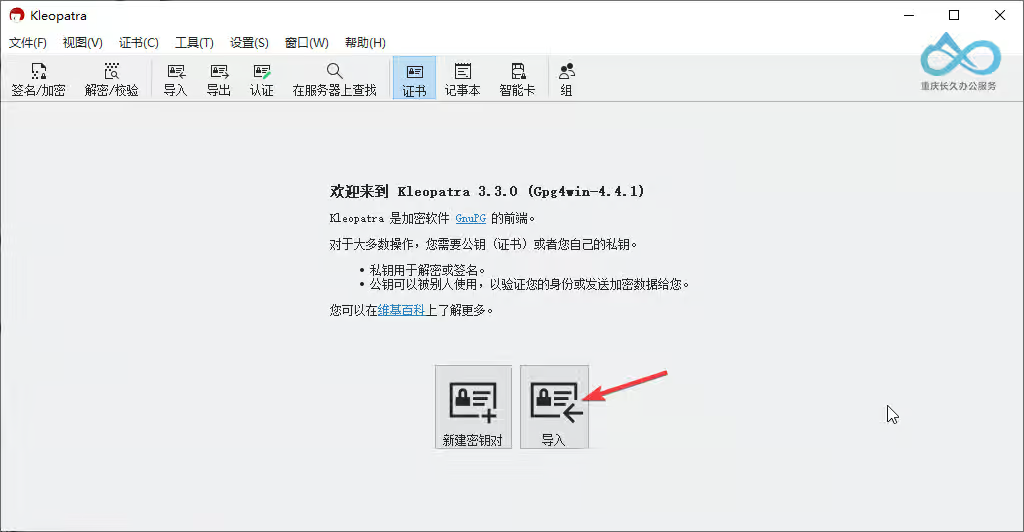
- Open Kleopatra (if not installed, download it from the official website; this tutorial only provides PuTTY download links);
- Click Import Certificate and select your public key file to import.
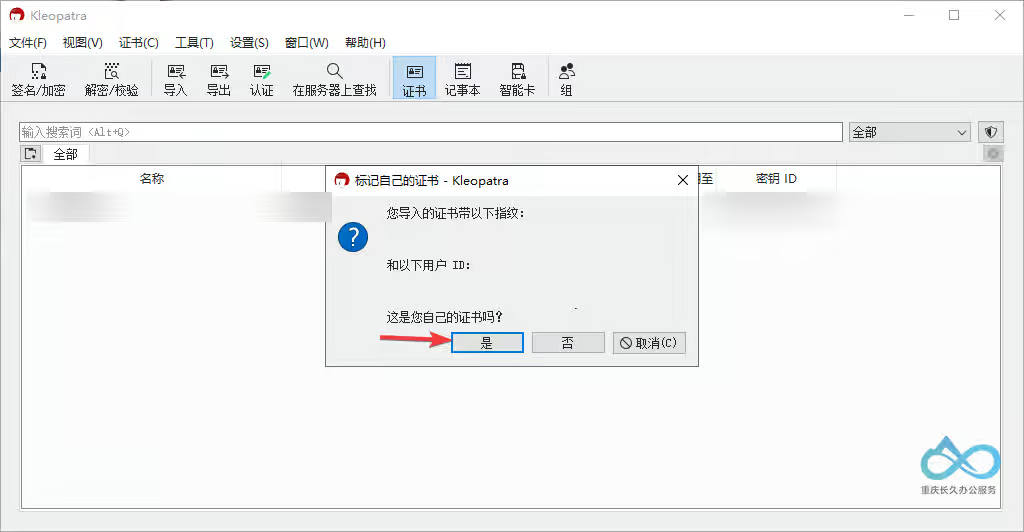
Step 2: Verify Certificate Ownership
After import, a window will pop up: "Is this your own certificate?" Select "Yes" (to ensure the certificate is bound to the hardware key, not just importing the public key).
Step 3: Enable PuTTY and SSH Support
- Menu Bar → Settings → Configure Kleopatra;
- Check PuTTY and SSH support (to ensure PuTTY can recognize the private key in the hardware key).

Step 4: Login to the Server via Hardware Key
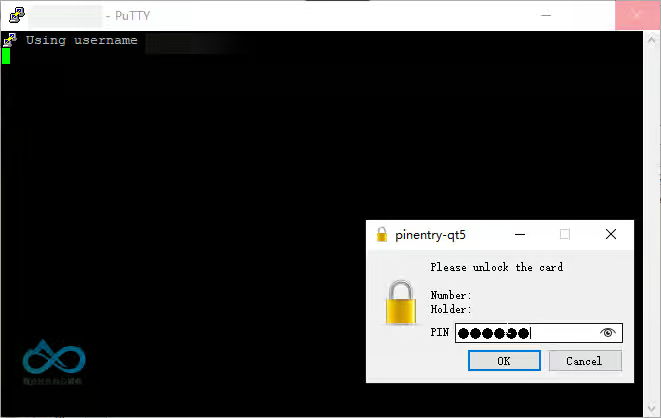
- Insert the hardware key, open PuTTY, load the previously saved session, and click Open;
- When PuTTY prompts for a password, enter the hardware key’s PIN code;
- The hardware key’s indicator will flash—tap the indicator area to complete secondary confirmation (physical button verification to prevent malicious use).
Login Successful!
After completing the above steps, PuTTY will authenticate your identity via the hardware key, allowing you to log in securely without entering the server password.
PuTTY Download Link
Our Mirror: https://www.yinyuee.com/download/putty
✅ Original PuTTY Program (synced with official sources, ensuring security and no tampering).


Comment